CCTV MediaCampaign Wiki
DSP OPERATIONS · STEP-BY-STEP

Build a DSP campaign
from creative to reporting.

A practical walkthrough of the complete CTV Media workflow, with focused video clips, screenshots, setup instructions and validation checks.

Watch the full walkthroughAll 10 chapters in one guided video · 4:01
Start the guide 10 chaptersAbout 4 minutes of video
CAMPAIGN FLOW
CreativeCampaignExchangeTagTestReport
01—10One connected delivery path
01creative02Attach the media file03campaign04Set budget and pacing05targeting06Connect the Ad Exchange07ad tag08Build and share the channel09Test end-to-end delivery10Verify campaign reporting
01
Campaign assets

Create the creative

Create the creative container that will hold the video ad and make it available to the campaign.

▶ Focus clip
Annotated screen
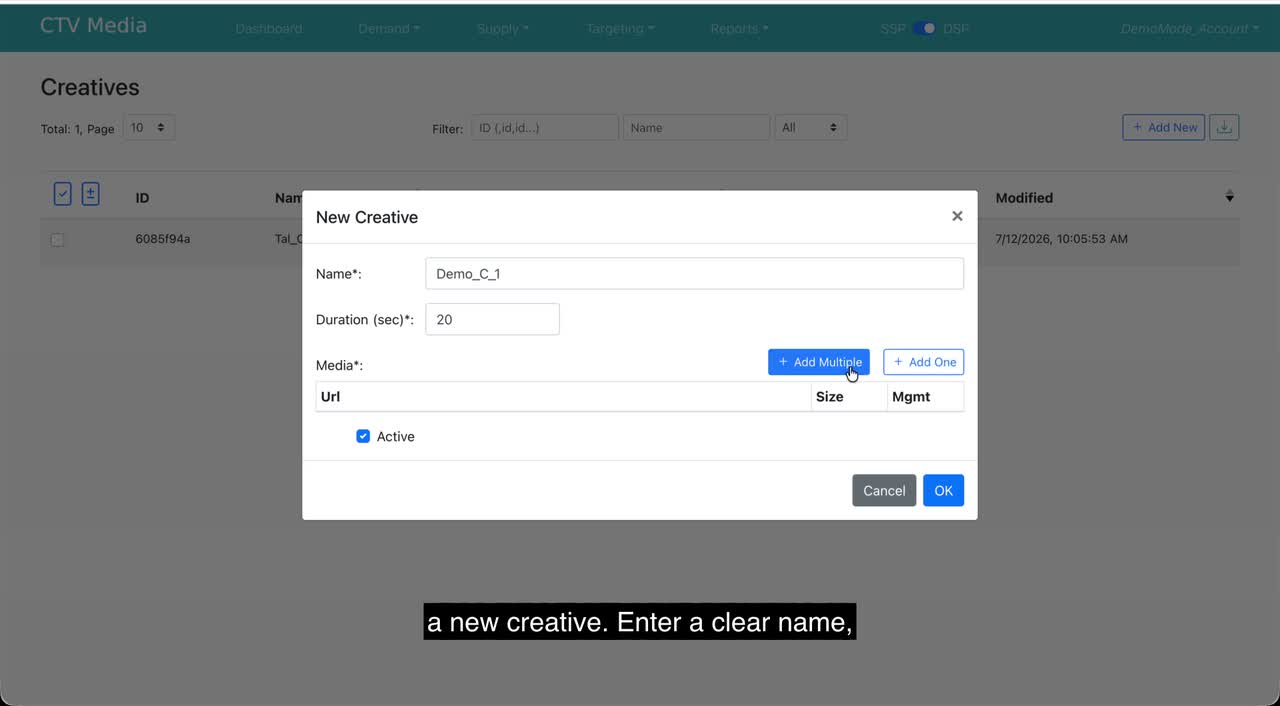
Create the creative screen with annotated fields123
1Creative name2Duration in seconds3Add the media asset

Procedure

  1. 1

    Open Demand → Creatives and select Add New.

  2. 2

    Enter a recognizable creative name and set the video duration.

  3. 3

    Keep Active enabled, then continue to add the media asset.
Before you continue

Name is uniqueDuration matches the videoCreative is active
Back to top ↑
02
Video source

Attach the media file

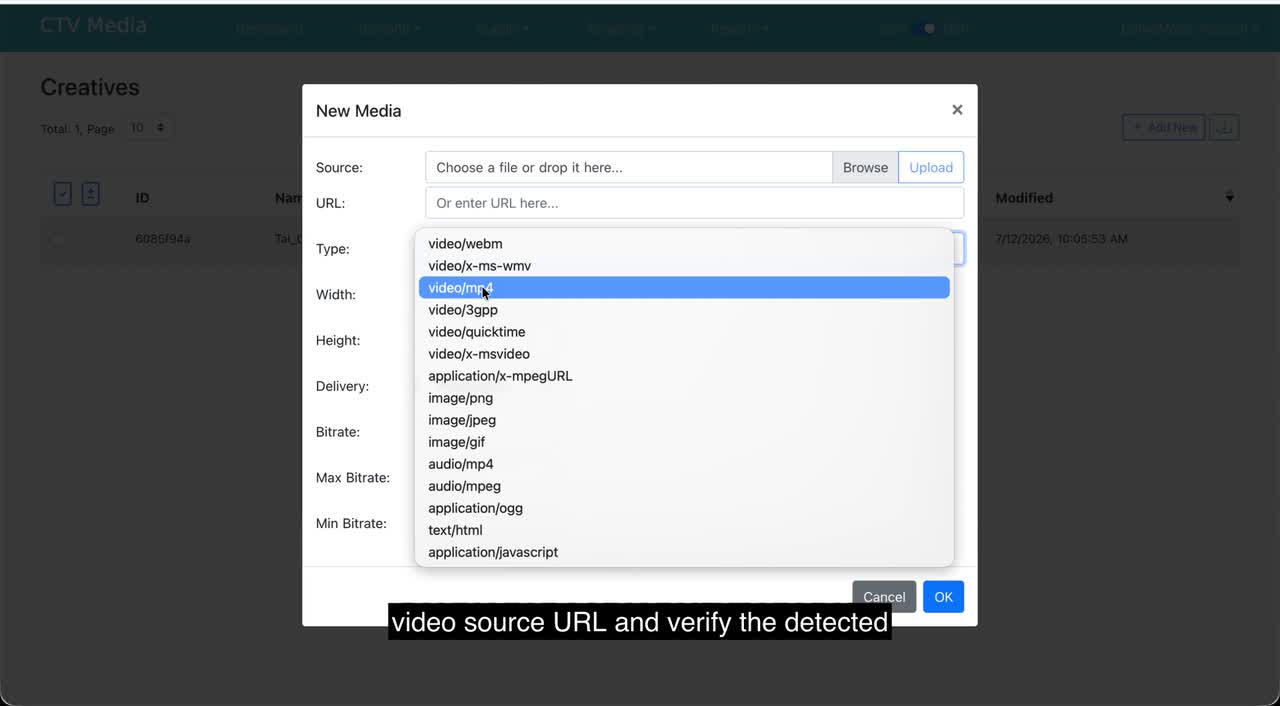
Add the hosted video URL and verify the technical properties detected by the platform.

▶ Focus clip
Annotated screen
Attach the media file screen with annotated fields123
1Paste the hosted video URL2Confirm the detected media type3Save the media

Procedure

  1. 1

    Choose Add Media inside the creative.

  2. 2

    Paste the public video URL into the URL field.

  3. 3

    Confirm the media type, width, height and delivery mode, then save.

Before you continue

URL is publicly reachableType is video/mp4Dimensions are correct
Back to top ↑
03
Campaign setup

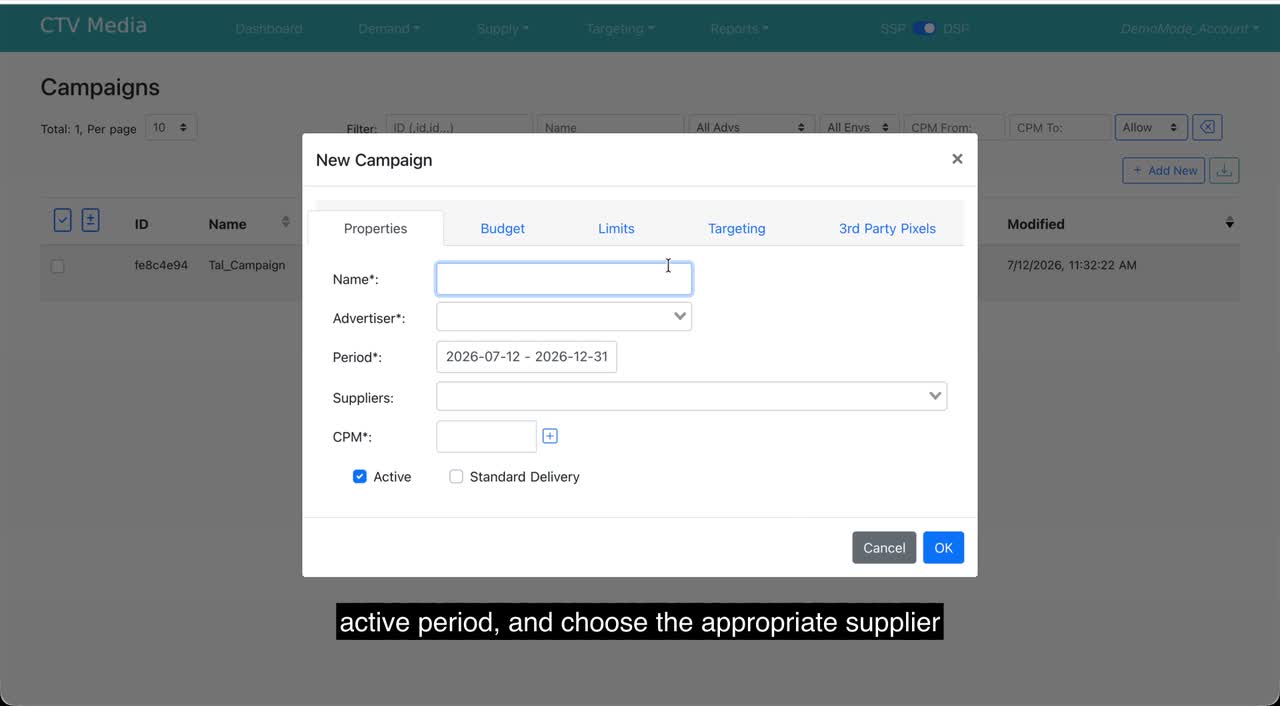
Create the campaign

Define the campaign identity, advertiser, active dates, supplier and delivery model.

▶ Focus clip
Annotated screen
Create the campaign screen with annotated fields123
1Campaign name and advertiser2Active campaign period3Supplier and CPM

Procedure

  1. 1

    Open Demand → Campaigns and select Add New.

  2. 2

    Name the campaign and choose the correct advertiser.

  3. 3

    Set the active period, supplier, CPM configuration and delivery mode.

Before you continue

Correct advertiserDates are currentSupplier selected
Back to top ↑
04
Delivery controls

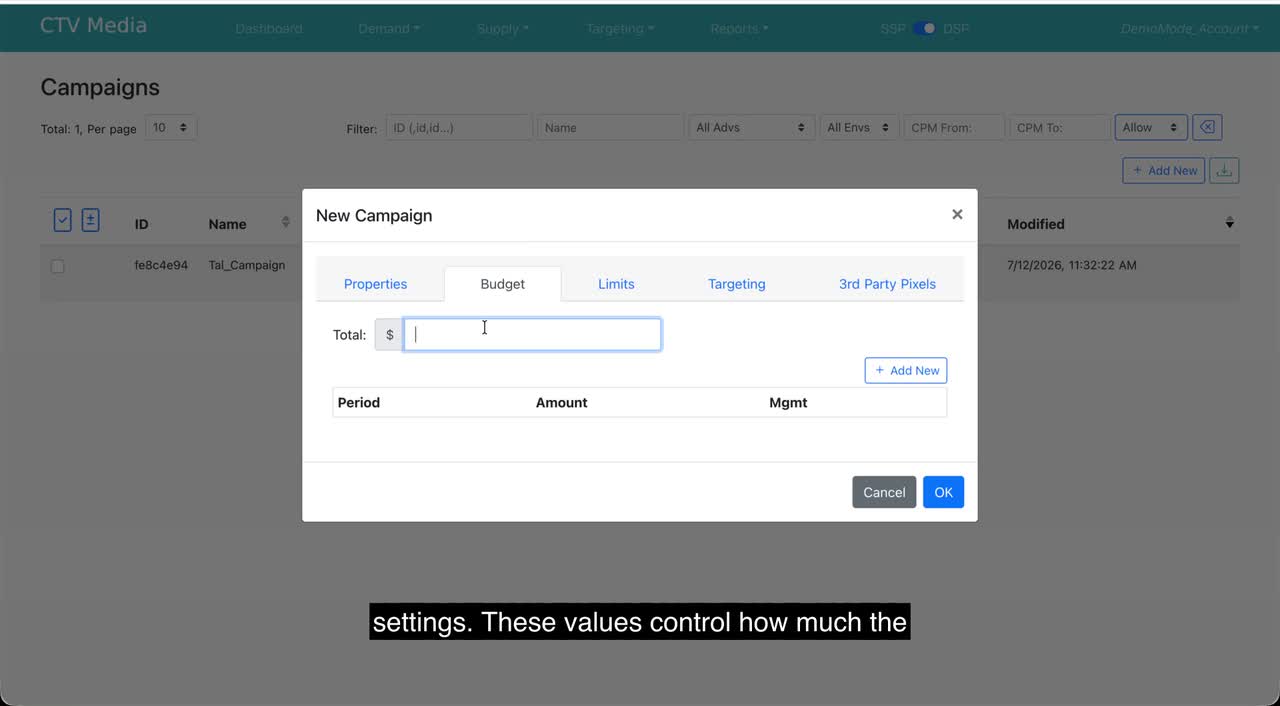
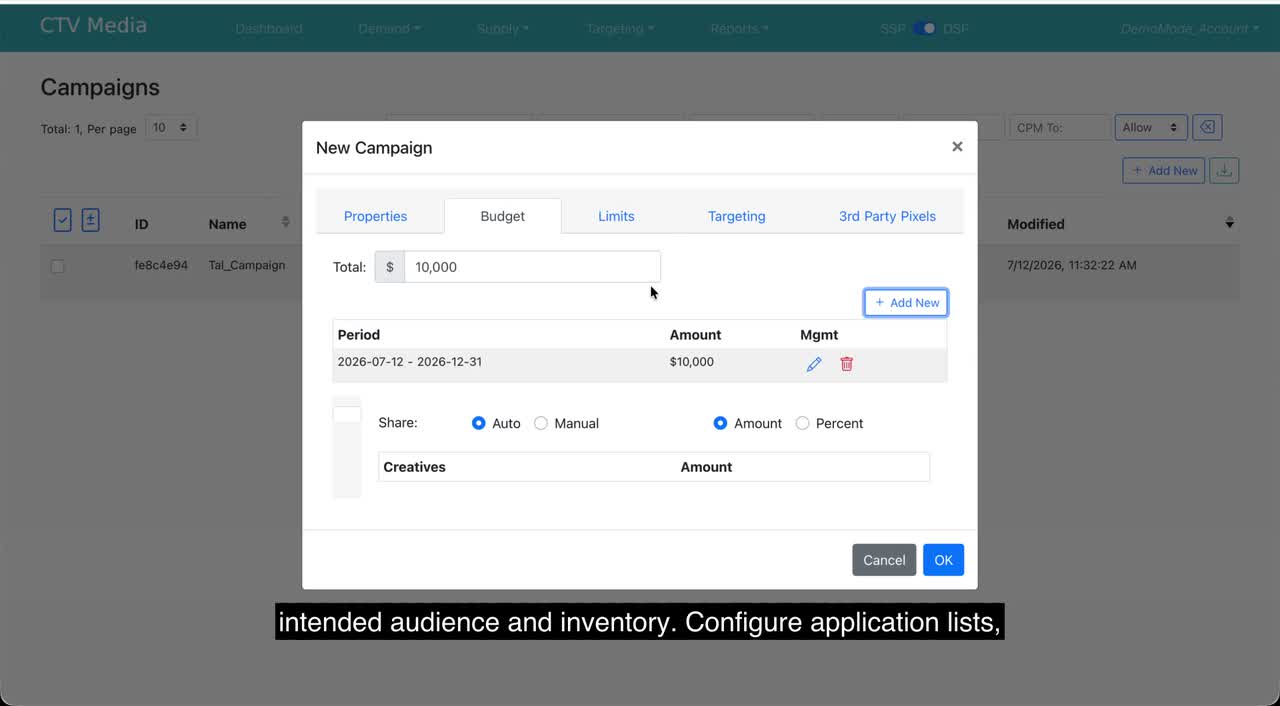
Set budget and pacing

Control the campaign's maximum spend and how that spend is distributed throughout the active period.

▶ Focus clip
Annotated screen
Set budget and pacing screen with annotated fields123
1Open the Budget tab2Enter the total budget3Add a period allocation

Procedure

  1. 1

    Open the Budget tab in the campaign editor.

  2. 2

    Enter the total budget and add a period-level amount when required.

  3. 3

    Review pricing, margin and pacing before continuing.

Before you continue

Total is approvedPeriod is correctPacing matches the plan
Back to top ↑
05
Audience & inventory

Configure targeting

Restrict delivery to the applications, locations, content, environments and devices that fit the campaign brief.

▶ Focus clip
Annotated screen
Configure targeting screen with annotated fields123
1Select include or exclude targeting2Location and application filters3Device and environment filters

Procedure

  1. 1

    Open the Targeting tab and decide whether each dimension should be restricted.

  2. 2

    Configure application lists, countries, states, ZIP codes and IAB categories.

  3. 3

    Review environments, TV devices, operating systems, deals, impression types and hours.

Before you continue

Include/exclude logic reviewedNo accidental restrictionsDevice rules verified
Back to top ↑
06
Inventory connection

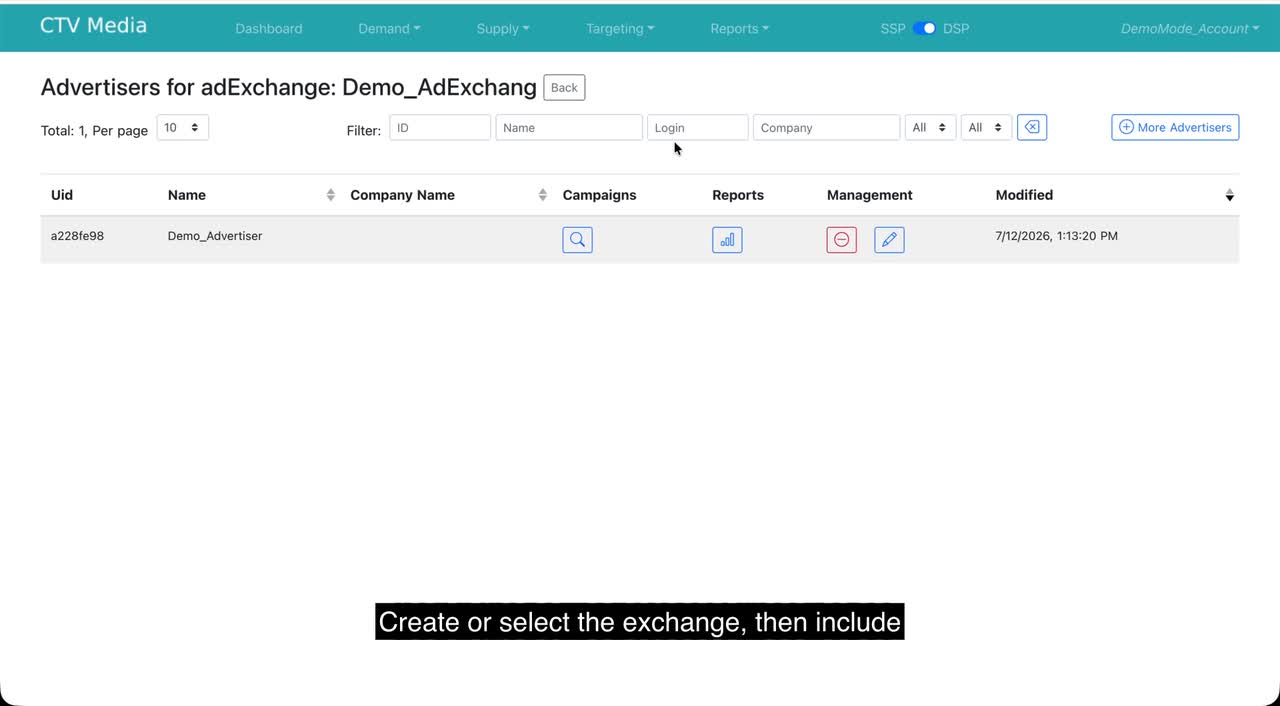
Connect the Ad Exchange

Associate the advertiser and campaign with the exchange that will send inventory and bid requests.

▶ Focus clip
Annotated screen
Connect the Ad Exchange screen with annotated fields123
1Open advertiser assignment2Open campaign assignment3Confirm the exchange is active

Procedure

  1. 1

    Open Supply → Ad Exchanges and create or select the exchange.

  2. 2

    Open the advertiser assignment and include the campaign advertiser.

  3. 3

    Open campaign assignment and include the newly created campaign.

Before you continue

Advertiser includedCampaign includedExchange is active
Back to top ↑
07
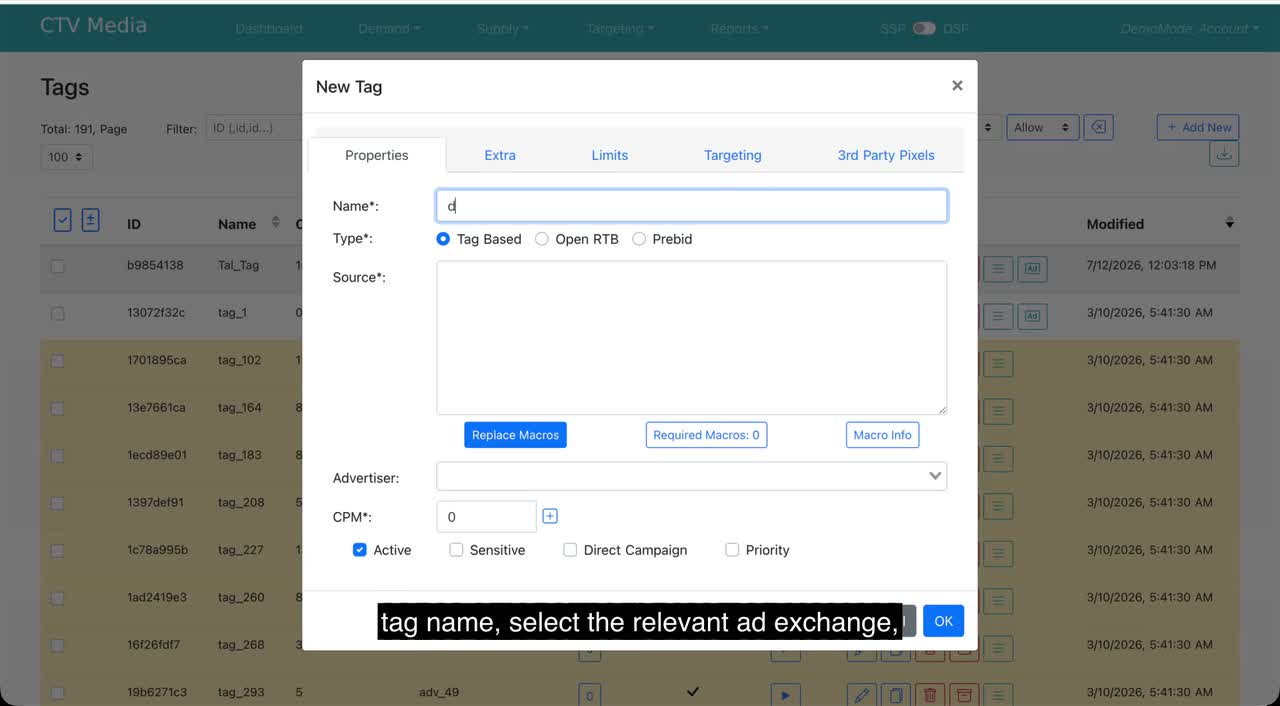
Demand tag

Create the ad tag

Create the tag that represents the demand source, then apply the appropriate exchange and targeting rules.

▶ Focus clip
Annotated screen
Create the ad tag screen with annotated fields123
1Enter the tag name2Paste the tag source3Select advertiser, CPM and status

Procedure

  1. 1

    Open Tags and select Add New.

  2. 2

    Enter the tag name, choose Tag Based and paste the source markup.

  3. 3

    Select the advertiser, CPM and exchange, then review tag-level targeting.

Before you continue

Source markup completeCorrect advertiserTag is active
Back to top ↑
08
Supply endpoint

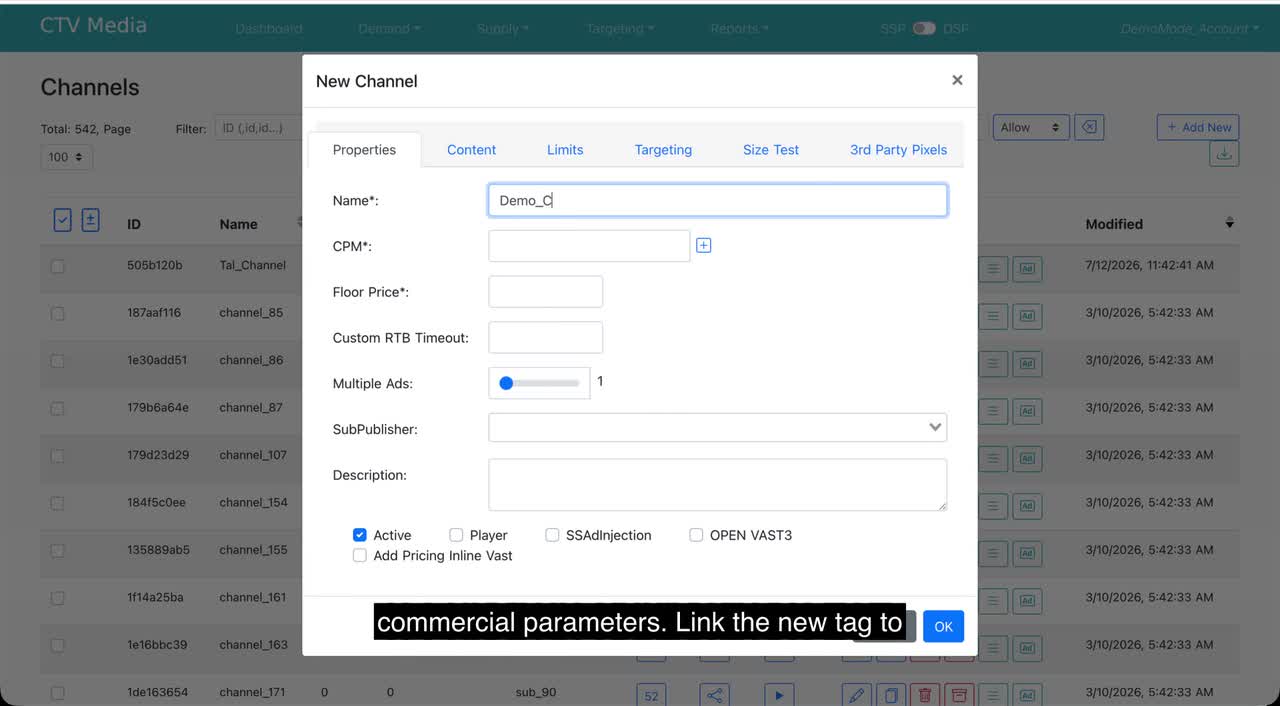
Build and share the channel

Create the channel, connect the tag and generate the VAST endpoint used by the downstream player.

▶ Focus clip
Annotated screen
Build and share the channel screen with annotated fields123
1Channel name and CPM2Floor price and timeout3Delivery mode and status

Procedure

  1. 1

    Create a channel and set its CPM, floor price and timeout values.

  2. 2

    Add the new tag to the channel and save the relationship.

  3. 3

    Open Share, configure the VAST parameters and copy the generated URL.

Before you continue

Commercial settings reviewedTag linkedVAST URL copied
Back to top ↑
09
VAST validation

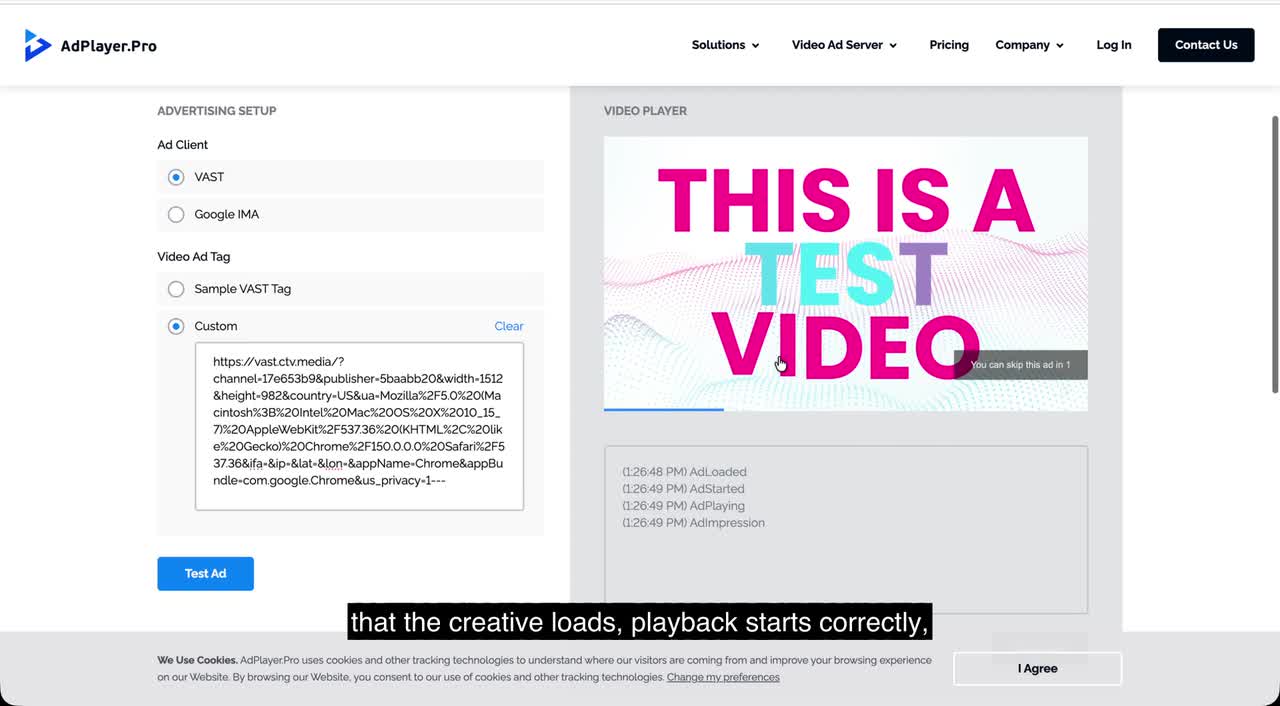
Test end-to-end delivery

Run the generated VAST URL in a test player and confirm that both playback and tracking behave correctly.

▶ Focus clip
Annotated screen
Test end-to-end delivery screen with annotated fields123
1Paste the generated VAST URL2Run the ad test3Confirm playback and events

Procedure

  1. 1

    Paste the generated VAST URL into the custom tag field.

  2. 2

    Run the test and confirm that the creative loads and starts playing.

  3. 3

    Inspect the event log for impression and quartile tracking events.

Before you continue

Creative playsNo VAST errorsTracking events fire
Back to top ↑
10
Performance check

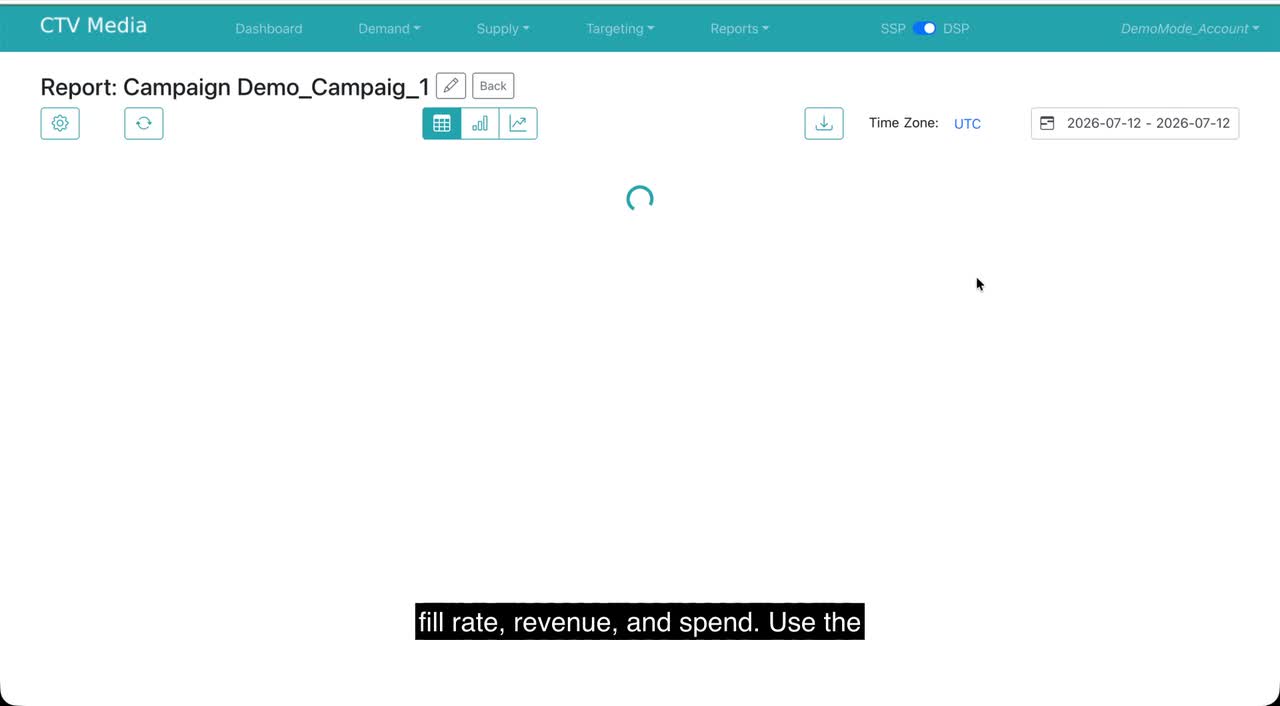
Verify campaign reporting

Confirm that traffic is visible in reporting and that the campaign is producing the expected delivery metrics.

▶ Focus clip
Annotated screen
Verify campaign reporting screen with annotated fields123
1Select the campaign row2Review delivery metrics3Adjust dates and filters

Procedure

  1. 1

    Return to the dashboard and open the campaign report.

  2. 2

    Review requests, opportunities, impressions, fill rate, revenue and spend.

  3. 3

    Use filters and dimensions to isolate the campaign and validate delivery.

Before you continue

Requests receivedImpressions recordedSpend and revenue expected
Back to top ↑

Campaign workflow completeCreative, delivery, validation and reporting are connected.

Review from the beginning →